Three reasons you need a thermal imager
All facilities are subject to thermal loss, moisture intrusion, and equipment failures – do you have the right tool to track these problems?
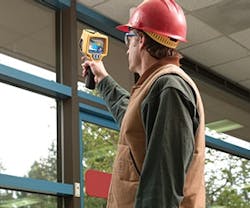
Thermal imaging cameras were once common in utility and industrial plants, but commercial buildings have just as many opportunities to benefit from thermography. These point-and-shoot imagers have earned their place in the FM toolbox – use them to find heat loss and moisture intrusion within seconds, take no-contact measurements from a safe distance, and create pictures of problems that are easy to understand.
A Picture Is Worth a Thousand Words
Using infrared wavelenths, these cameras can measure the thermal signature of an area as small as an electrical box to as large as your entire building envelope.
“This data is converted into a visual image that colorizes heat, making it quick and easy to identify thermal variance,” explains Roger Mavrides, vice president of engineering and product development for General Tools and Instruments.
The resulting thermographs reveal a spectrum of heat signatures that we can’t see with our naked eye, making them invaluable for spotting hidden problems, says Eric Woodroof, a certified energy manager and chairman of the board for the Certified Carbon Reduction Manager program.
Note that thermal imagers don’t measure temperature. “They measure radiated thermal energy from which a temperature is derived based on the amount of energy detected,” adds Gary Lux, a Level II thermographer and vice president of sales for manufacturer Palmer Wahl.
More than just a nifty-looking toy, these cameras can save you thousands of dollars – if you can’t manage what you don’t measure, then it’s equally true that what you can’t see and fix is draining your budget.
The very problems that can end up costing facility managers the most – poor insulation, roof leaks, and electrical malfunctions – are often the hardest to catch because they are hidden from view. Start by investigating these common problem areas.
1) Spot Electrical Issues
Count the number of motors, circuit breakers, and other electrical equipment in your building – are you confident they’re all working properly?
Because thermal imagers allow you to take measurements from a distance, they’re ideal for finding issues in equipment that could pose a safety issue to workers or are hard to reach, notes Lux. FMs will often find circuits that are overheating or motor bearings that are about to fail.
“You can diagnose problems in electrical distribution systems very quickly with thermal imagers,” says Tom Scanlon, vice president of thermography sales for the Americas with tool provider FLIR. “When a motor isn’t working right, for example, the outside of the bell housing will be noticeably warmer.”
Thermal images are also used to find loose connections. “Dirt will create additional resistance over time, which causes them to overheat. You can actually lose one of the phases of a three-phase system, putting you at risk of a power failure or fire,” Woodroof cautions.
Using thermography for predictive maintenance is another great way to catch problems that could blossom into major failures down the road.
“For example, we work with a motorcycle factory that recently installed new electrical motors on its production lines. They had only been running a week, but during their first inspection with thermal cameras, they found that all three of the new motors were overheating,” recounts Lux. “It turns out that the wrong models had been installed – they were being overtasked and were close to failure.”PageBreak
2) Identify Thermal Performance
The most common problem – and the one easiest to detect – is heat loss from walls, piping, HVAC components, doors, and windows.
“Infrared cameras can’t read air temperature, but they can measure the impact of that air temperature on a surface, such as the grilles on a vent,” explains Scanlon. “You can use this information to determine if the air flow is sufficient to disburse heat or cooling in a room. You may find that you have air infiltration from the windows, so no matter how appropriate the temperature is coming out of the vent, the room will never have the right thermal balance.”
Thermal imagers can be used during the construction phase of a project as well. “Let’s say you want to confirm that a contractor is doing a good job with the insulation during a construction project. You can literally take pictures of the roof and walls to see if there are areas where the insulation wasn’t put in properly,” says Woodroof.
Because IR cameras can cover such a wide area, it’s not uncommon to spot problems that you weren’t expecting to find. You may be on the hunt for one issue, but the thermal reading will bring another trouble spot to your attention.
“One time we were looking for heat loss around a fuse box in a cold storage area of a facility. As we were taking readings, we also noticed that cold air was leaking out of the freezer high up on a wall,” recalls Woodroof. “We wouldn’t have caught this additional savings opportunity without seeing the thermal variation.”
3) Root Out Roofing Problems
Your roof is one of your most valuable assets, so you don’t want to find out about a leak when an employee reports a puddle on their desk. You can use thermography to track roof conditions and spot problems before they wash out occupants below.
“Typical roof problems are punctures, compromised membrane around an HVAC unit, or gaps in a seam,” Scanlon says. “With any of these, water will saturate the insulation above the roof deck. This moisture will heat up as the sun shines down. At night, the roof will radiate heat, but the areas holding moisture will take longer to radiate because they have a higher thermal mass. There’s a certain time of the evening between sundown and midnight when these spots will stand out like a sore thumb.”
Thermography may even save you from having to replace a roof altogether because you were able to pinpoint the specific issue. “Taking thermal images from a plane, you can see where a leak has compromised the roof insulation. Instead of replacing the whole roof, you can isolate the damaged area for repair,” recommends Woodroof. PageBreak
Avoid These Hot Mistakes
Thermal imagers are relatively simple devices, but like any diagnostic tool, it’s possible to make mistakes with time. Novice users may forget to set up the ranges on the camera or overlook whether the measurement is in Celsius or Fahrenheit.
The first rule of thermal imaging is to remember that unlike Superman, thermal images don’t see through objects – they can’t look behind walls, doors, or covers. “They only see the first 1/10,000 of an inch of the energy radiating off of a surface,” explains Lux.
This is most commonly forgotten when searching for moisture problems.
“It’s a myth that you can detect a water leak behind a wall,” notes Jeff Abramson, director of thermography development with tool developer Fluke. “You can only spot moisture intrusion if the wall material easily conducts heat or the water changes the surface temperature of the wall. Drywall is a good example – I can stand behind a panel, spray water on it, and a thermal camera will read it on the other side. But if a water leak is running down a pipe and pools below your floor surface without affecting the wall, you probably won’t see it.”
Users often overlook the concept of emissivity. "Emissivity is the property of a surface to emit energy via radiation. Getting an accurate temperature of a bright metal surface is extremely difficult," Abramson adds. "A thermal imager will often provide a table of common materials and their emissivity values. However, just setting your thermal imager to that emissivity may not give you an accurate reading."
Emissivity also applies to glass – it will reflect back your own heat signature if you’re standing at the right angle. “Sometimes the angle can be difficult if a reflection is amplifying the thermal read,” explains Woodroof. “Just like the glare from the sun while driving, the glare from a window can create a false impression of the heat signature. You may need to adjust the angle that you take the reading from to get a proper measurement.”
Measuring objects outside can also be tricky because you need to pay attention to wind speeds, Abramson stresses. Even a 10 mph breeze will give you a much lower temperature reading than what the object really is. This can also be a problem inside if you have fans running or are scanning something under a hot air return.
Training Recommendations
Developed by the American Society of Nondestructive Testing (ASNT), thermography training is covered in three certification levels. Training organizations such as the Building Sciences Institute or private companies can provide certification.
Level I – involves a one-week class covering theory and practice, a test, and training to gain an endorsement from a Level II or III thermographer. This is the most common level for facility managers.
“I recommend getting a Level I certification,” advises Jeff Abramson, director of thermography development with Fluke. “For people who are going to use thermal imagers every day for their job, this is a small price to pay.”
Level II – advances the experience base of a thermographer. Not only are you able to determine the root cause of a problem, but you can also recommend repairs to address it. This is useful if you don’t want to hire a contractor every time you spot a problem.
Level III – develops maintenance and inspection practices for a company and is able to train other thermographers.
If certification seems like overkill, there are many resources available to busy FMs who only need a quick overview, says Roger Mavrides, vice president of engineering and product development for General Tools and Instruments.
“It’s a common misconception that you have to be a licensed thermographer to properly use these tools – that couldn’t be further from the truth,” stresses Gary Lux, a Level II thermographer with manufacturer Palmer Wahl. “It’s fantastic if you have a Level I or II thermographer on staff, but you can also take application-specific courses.”
Most manufacturers offer online training modules or DVD instruction with their tools. Other organizations provide classes that you can take at your own pace.
It’s important to read equipment during normal operating loads.“If you’re looking at a target in an electrical distribution system, you can’t expect to find a problem if it’s not under load,” cautions Scanlon. “Some people make the mistake of taking measurements on their switchgear under irregular building conditions, such as when a production line is offline or operating at a reduced load.”
Thermal imagers are often confused with handheld spot temperature guns. Both use infrared, but thermometers measure only one point, as opposed to the thousands of points a thermal camera uses, says Mavrides.
Use an IR thermometer only if you know the location of a problem (e.g. the sealant on the second window from the left) and leave the infrared camera for when you’re not sure if a problem exists in the first place.
Justify the Cost of a Camera
There’s no doubt about it – thermal cameras are a pricy addition to a facility manager’s tool belt.
“A good quality camera will cost between $3,500 and $9,000,” Lux observes. “But the price of handheld cameras has really dropped – 10 years ago, the same model could have been around $40,000.”
When selecting a camera, carefully look at the warranty, recommends Lux. Depending on the application, some thermal images need to be recalibrated annually – at $700-1,500 per adjustment, this represents an ongoing investment. Some companies may include recalibration in the warranty.
Others might offer a one-time replacement if the camera is accidentally broken. The tools are typically built to withstand modest drops, such as from a ladder, but a trip from the roof to the pavement below will cause irreparable damage.
Large facilities or those that are mission critical are most likely to own thermal imagers and use them extensively, says Woodroof. Smaller properties are apt to have them for troubleshooting specific equipment but will still hire an outside electrical firm for yearly inspections.
“A building can have a particular system that benefits from regular thermal imaging,” notes Abramson, “but the person specializing in that component may not consider pointing the camera at the roof to look for moisture. A contractor will look at the whole building.”
It’s important to keep track of savings opportunities you uncover with your thermal imager to help quantify payback.
“For $2,000, you can buy a tool that produces high resolution thermal images with over 19,000 pixel elements,” says Scanlon. “If in the first week of using a thermal camera you haven’t found at least the price of the tool in savings opportunities, you’re not using it right.”
Not only will it catch problems that you literally can’t see, but a thermal camera can decrease labor costs, keep workers safe, qualify you for insurance breaks, and increase the frequency of inspections you can perform.
Thermal imagers can also provide leverage when you need approval for upgrades. Instead of taking an incomprehensible spreadsheet of data to company leadership, you can show them a visual that instantly makes the problem clear.
“I once found about a mile of uninsulated pipe in the steam trap tunnels at a facility,” says Woodroof. “It’s really helpful to have a picture of a deficiency like that and take it to a CFO to request funding.”
If the cost still seems steep or you want to test the tool before purchasing one, some utilities, cities, or large companies have a tool library where you can rent or check out a thermal imager, notes Woodroof.
“The bottom line is that any time you find that your building is compromised, you are losing money – dollars are going right out your roof, windows, and doors,” argues Scanlon. “There’s so much about your building that you can understand with a thermal camera that you wouldn’t see otherwise. There will be a time when every facility manager uses an IR camera and wonders, ‘How did I ever do my job without one of these?’”
Jennie Morton ([email protected]) is associate editor of BUILDINGS.
About the Author
Jennie M. Morton
Jennie M. Morton is a freelance writer specializing in commercial architecture, building engineering, and sustainable design.